Showing posts with label gifts. Show all posts

Tuesday, December 11, 2012

Holiday Rush

I don't know about any of you but the holiday hustle and bustle is in full swing at our house.
We have already attended one Christmas party, we have another one this coming weekend and then 2 the following weekend.
 
In between there we are working hard to finish the playroom, craft room, have carpet installed, finish up our shopping, and for me...making gifts!!
 
I love to give people small tokens to let them know just how special they are to me, especially at this time of year! I also really enjoying adding some fun new crafts that have been on my "to do" list to my "done" list!!
 
Currently on my to make list is:
*Initial cup
*People blocks
*Matching shirts (for my neices!)
*Cookies
*Ornaments with the kids
*Holiday tags
*Hot Chocolate mix/chocolate dipped spoons
*Popcorn Seasoning Kit
*Holiday shirt for kids
 
I think that is it for right now...but I'm sure I will think of many more things that I should make!!
 
And I finally got around to ordering my holiday cards, so at least that part of things is done! YEAH!
signature

Monday, October 22, 2012

Month to Month

I LOVE making crafty gift for others...its fun, personal, and gets my need to be craft out!!
 
Well with babies galore coming in every direction right now I have been on hunt for some good ideas. I am sure you have seen all the adorable monthly onesies out there. Here are a few examples:
 
{photo credit: boogaboohandmade.blogspot.com}
 
DIY Monthly Onesies
{photo credit: brittanyleighpotter.blogspot.com, and be sure to stop by her site since she even gives you the files to print your own (both boy & girl colors!!)}
 
Since I have a Silhouette I decided to create my own since the mom-to-be isn't sure if her bundle is a boy or girl!!
 
To start I went out and got onesies in a variety of sizes. The sizes I purchased were 3 month, 6 month, and 12 month. I figured that even if they were a little big it would be okay.
 
Supplies:
Onsies (variety of sizes)
Inkjet Transfer Paper
Iron
 
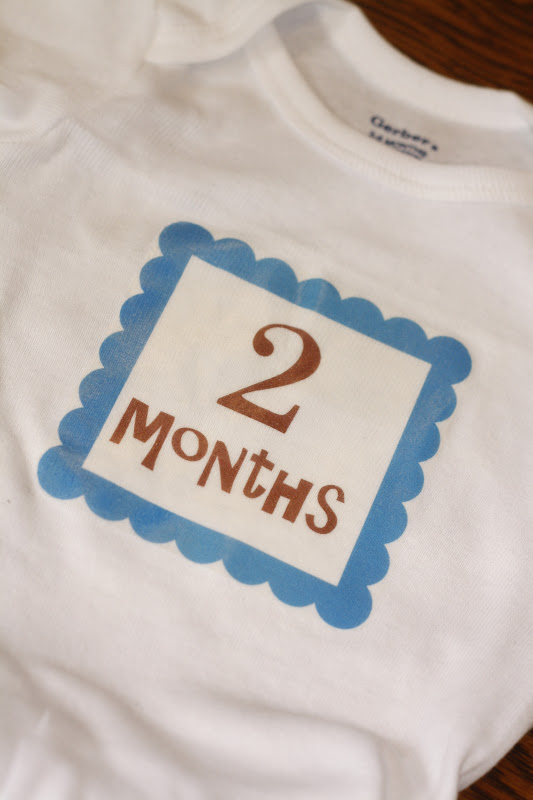
To start I used my Silhouette to make a basic design for my onsies. I went with a frame and then added the month on the inside. Once you have your design down (you'll want to keep them at a size you can fit 4 per page, print them out on your Inkjet Transfer paper. **For colors you could totally customize for a boy or girl or go neutral like I did.
 
Then cut them out, keeping only a tiny edge around the outside of your design.
 
 
Once all mine were printed and cut I ironed them on the onesie.
(Follow the instructions from Transfer paper package as times may vary)

 
Here is a completed onesie:

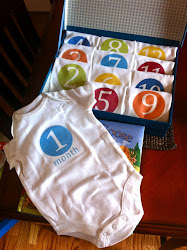
Here is my collection, I rolled them and put them together in a box.


I added a fun little note to go with them for the mom-to-be!!

 
 This is one of my new favorite gifts...now if more people I know would just have babies!!
 
signature

Tuesday, December 13, 2011

Take Notes

Looking for a fun and simple holiday gift?? Well I found the perfect thing for you. 
 
 
Simple and fun note holders!
Here is what you'll need:

  • Clear Acrylic 4x6 photo holder
  • Scrapbook paper
  • Post-It Notes
  • Fun letters and accessories
  • Hot glue gun w/glue or E-6000

To start cut your paper to fit into the frame. Once you have this done add your Post-It Notes, I removed the back paper and the just stuck the last Post-It to the frame.

When you have that done, you can add fun letters and other details to make it fun. I used some extra letters I had around as well as some buttons, and ribbon. You could use almost anything. Just get out your hot glue gun or E-6000.

Here are final product! I LOVE how they turned out and definitely plan to make more!


signature

Sunday, December 4, 2011

12 Days of Christmas

I love to give thoughtful and unique gifts so this year I decided that it would be fun to do something different. I saw on How Does She a fun holiday gift for the teachers using the 12 Days of Christmas.
So since I am homemade gift queen I knew that I was going to have to get some ideas together and then get started early figuring out what gift when etc.
Well, I made a list of some of my finds and things I knew would come in handy for any teacher and let my daughter chose which ones she wanted to give.
Here is what we came up with:
Day 1: Frame
Day 2: Scrabble Tile necklace w/extra charm
Day 3: Hot Chocolate
Day 4: Post It Notes
Day 5: Kleenex/Hand Sanitizer
Day 6: Binder Clips
Day 7: Pens/Sharpies/Markers
Day 8: Muffins
Day 9: Coffee pods
Day 10: $10 Barnes & Noble card
Day 11: Gum
Day 12: Magnet Board & 12 magnets
 
We had lots of fun coming up with ideas of what to do, but there are many other versions you yourself could do.
Check out How Does She for their version:
 
teacher-supplies-gift
 
Or this version by Crafting mom, which is for teacher appreciation, but can easily be adapted!!


I love the idea of not only getting crafty, spreading out the love, but also giving gifts that are useful.
 
Hope you are enjoying your holiday seasong!
 
signature

Monday, August 15, 2011

Baby Bonanza


Currently we have 2 friends that are expecting babies. One is expecting their second, hopefully a girl, and the other their fouth...SURPRISE!!
Even though they have supplies and this isn't their first our group of friends decided we should have a baby shower for them anyway. Nothing super fancy just a reason to get together and celebrate some great friends and their new additions.
 
  1. I decided since I had recently mastered the ruffle that this meant I should really try to make ruffle bottom onesies...I've been dying to make these! I started off with the onesies and choosing my fabric/ribbon.                                                 
  2. I sewed down the middle of the fabric/ribbon with the loosiest stich on my machine.
  3. Next I pulled the top thread to make the ruffle. I pulled it pretty tight, and then loosened it to make it fit the length of the onesie.
  4. Next pin the ruffle onto the onesie where you would like the ruffle. I hadn't pinned in my previous trys, but with this you really want it to be perfectly straight.                                
  5. Once pinned I I sewed down the middle of the ruffle. Then continue on with the rest of your ruffles, mine are less than an inch apart to create a close ruffle. (As you can see with the fabric ruffles they are slightly wider so I only put 2, 3 just looked too crowded.
  6. All done and ready to enjoy!

Here are my completed baby gifts. Each mom also recieved a coordinating long-sleeve onesie, crocheted hat, and then personalized blocks. (I make the blocks as well, they are my home-based business)
 

                                                         signature

Monday, June 6, 2011

A tisket, A tasket

Have you been thinking about an end of the year teacher gift?? Well I have and I am always trying to figure out what to do. Well, when Emmah was in Preschool I found this GREAT idea to make an alphabet basket. What you do it you hand out letters to each child in the class and buy a gift to represent each letter! I did it twice in preschool and then again in Kindergarten.
 
Well Jake had a really small preschool class so I didn't  even attempt, so I was super excited to give it a try this year! It is always so much fun to see what people come up with for each letter.
 
Here is this years basket:


 I am hoping to get a couple more uses out of this, because at any age it is fun to, you can even do it with gift cards alone!! Happy Summer to all you! I know we will be having a great time this summer!
 signature

Saturday, February 26, 2011

Dry Off

I have really been in the sewing mood lately and have gone sewing crazy!! Currently I am working on completing a gift for a good friends baby shower. I am making 2 hooded towels, some burp cloths, and I think I might even try a bib or two!!

Here are my hooded towels:

To make them I followed this tutorial by The Cottage Mama (LOVE her tutorials, she gives simple directions and good photos!!)

I simply can't wait to give them as gifts!! I am currently also making one for my own kids!!


Photobucket