


Since it's been warm and Emmah as in need of some new tank tops I decided it was time to make some fun/fancy ones for her! I picked up a few plain tanks at Old Navy and got to work designing and creating! (Of course you could get them from any where you like, but they had a $2 sale and I jumped right on that!)
Tank 1:
Materials:
*tank
*ruffle trim 1/4 yard (depending on length of rectangle)
*scrapbook paper pattern
*fabric scrap
For this one I wanted to use some ruffle trim I found...and am now in LOVE with. So I first cut a rectangle to go down the middle of the tank.

Next I cut the trim to the same length and made sure the top had a curve to fit the tank. I used some extra scrapbook paper to make a small pattern to make sure it fit nicely along the top edge. I did put a piece of Steam a Seam on just the rectangle, this will help to attach the trim and hold it in place.

Then I used some Steam a Seam to put on the back of it. This will help it to adhere to the tank, even though I am planning to sew it every little bit helps.

Finally we were ready to iron it on!! I followed the directions on the Steam a Seam package. Once it was ironed on, I went ahead and stiched with some black tread around the outside of the rectangle.
This is my final result:

Tank 2:
Materials:
*tank
*2 coordinating fabrics
*2-3 buttons
*Steam a Seam
For the next tank I decided to go with more of a bib look. I use some old scrapbook paper and cut myself a pattern.

Next I chose my fabric and cut out my shapes. I then ironed them on doing the larger bib shape first and then the rectangle on top.

**Sorry I don't have good pics for this one..I don't know what happened!!
Tank 3:
Now for tank three I wanted to be simple but fun! So having wanted to make rolled flowers for the longest time I decided this was it!
Materials:
*tank
*hot glue gun
*2" fabric strips
*Needle and tread
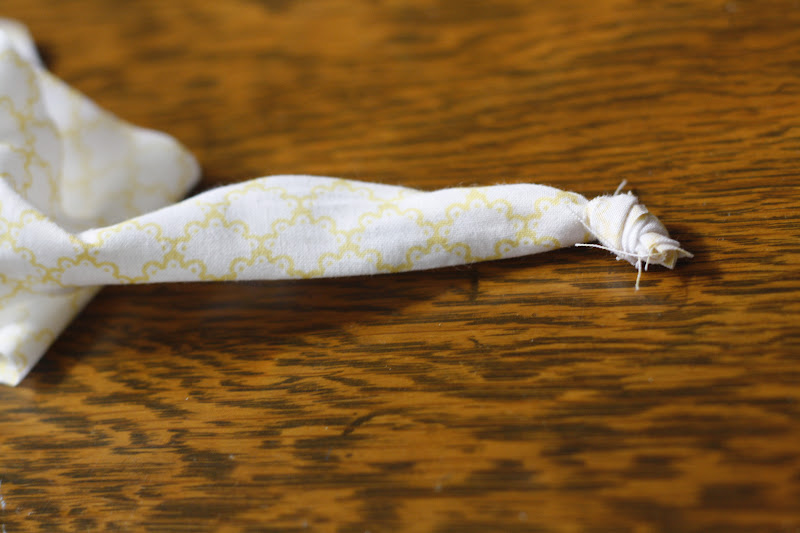
First I cut 2" wide strips of my 3 fabric choices. Depending on the size you want the flowers will depend on how long you cut the strips.Then I tied a know in the end. This knot will become the middle of your flower so you want it as close to the end as possible, and it doesn't have to be super tight.


Here are what my flowers looked liked when I was finished. These were super easy and quick.

I then went ahead and sewed them onto the tank. I went around the outside edge of each flower going all the way around the outter edge and then did a couple of stiches in the middle to make sure the flowers were completely attached.

Here are what my final tanks look like:

I just LOVE how they turned out and am looking forward to making more as well as making some for myself.


No comments:
Post a Comment