Showing posts with label sewing. Show all posts

Friday, August 17, 2012

Ruffles

I LOVE that my daughter has finally taken some interest in her girly side!! It has seemed to grow in the last couple years too!!! (Best part is she is a HUGE sports fan too, so she is a perfect mix!!)

I absolutely LOVE ruffles....on pants, shirts, dresses, skirts, home decor, you name it I think you can put ruffles on it! So of course when I saw this ruffle skirt I just knew I had to give it a try!! Even better that it is made with t-shirt scraps so it is low budget!

Ruffle Mania Skirt

Supplies:
  • tshirts ( I worked with 4 adult and 2 smaller kids sized)
  • thread
  • scissors
  • elastic
1. To begin you will need to make a base for your skirt. I used a sz medium adult tshirt and cut off the arms and sewed the openings closed. Depending on the length you like you may be able to skip that step.
2. Your next step will be to cut strips out of the tshirts. I cut mine about 2" in width, but depending on how wide you want your ruffles you can cut them wider or thinner.


{Here is my collection of tshirts, I mixed colors and patterns}

3. Next you will need to ruffle your tshirt strips. (Here is a link to a tutorial if you are unfamiliar with ruffling, see kate sew)
4.The next step for me was to layout my ruffles...mixing the solid with the print. I also at this point drew lines on my skirt so that my ruffles would be lined and would be evenly spaced and straight on the skirt.
5. I now began sewing my ruffles on one at a time. This took some time and be sure to make them go all the way around the skirt, varying where the each begins that gives you the mixed up look. You can also make your ruffles longer so they go all the way around without mixing on each layer. Be sure to leave about 2-3" to make the waist band.

6. To do my top waist band...I sorta imporvised by cutting a strip to cover the top of my base skirt. I did this since my base shirt actually had a design on it, but if yours is plain you won't need to do this. For the waist band, fold over the top of the of the base skirt and sew, leaving a 2" opening to put in the elastic. I cut the elastic between 2-3" smaller then the waist measurement that way its comfortable.

7. To add the elastic, sew in one spot along the waistband. I chose what would be the side. Next, put a safety pin at the other end of the elastic and move it through the waistband. Once you have it all the way around sew the end to the other end.

8. Wear and enjoy! Here is my final project! I just LOVE how it turned out and so does my daughter, now it's time to make one for me!!

{Please excuse the strings....I forgot to go back and take another pic!!}

signature

Monday, June 18, 2012

Tanked

Summer is FINALLY here and with that comes warmer weather...well usually!! We've had some warm ones here in Michigan, so I'm not complaining at all!!
Since it's been warm and Emmah as in need of some new tank tops I decided it was time to make some fun/fancy ones for her! I picked up a few plain tanks at Old Navy and got to work designing and creating! (Of course you could get them from any where you like, but they had a $2 sale and I jumped right on that!)

Tank 1:

Materials:
*tank
*ruffle trim  1/4 yard (depending on length of rectangle)
*scrapbook paper pattern
*fabric scrap

For this one I wanted to use some ruffle trim I found...and am now in LOVE with. So I first cut a rectangle to go down the middle of the tank.
Next I cut the trim to the same length and made sure the top had a curve to fit the tank. I used some extra scrapbook paper to make a small pattern to make sure it fit nicely along the top edge. I did put a piece of Steam a Seam on just the rectangle, this will help to attach the trim and hold it in place.
Then I used some Steam a Seam to put on the back of it. This will help it to adhere to the tank, even though I am planning to sew it every little bit helps.
Finally we were ready to iron it on!! I followed the directions on the Steam a Seam package. Once it was ironed on, I went ahead and stiched with some black tread around the outside of the rectangle.
This is my final result:


 Tank 2:

Materials:
*tank
*2 coordinating fabrics
*2-3 buttons
*Steam a Seam

For the next tank I decided to go with more of a bib look. I use some old scrapbook paper and cut myself a pattern.
Next I chose my fabric and cut out my shapes. I then ironed them on doing the larger bib shape first and then the rectangle on top.

Once this was done I stiched around the outside of each piece. Bib one first then the rectangular piece. Once that was done I then added a couple buttons right down the middle.
**Sorry I don't have good pics for this one..I don't know what happened!!

Tank 3:
Now for tank three I wanted to be simple but fun! So having wanted to make rolled flowers for the longest time I decided this was it!

 Materials:
*tank
*hot glue gun
*2" fabric strips
*Needle and tread

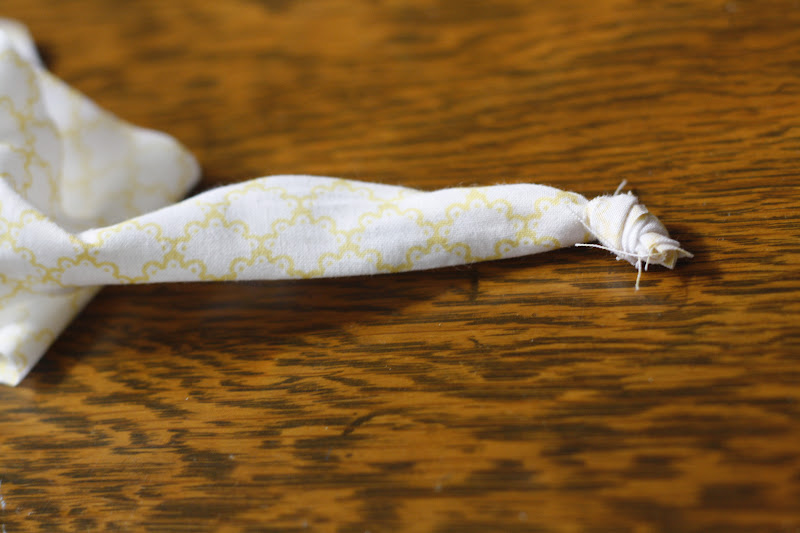
First I cut 2" wide strips of my 3 fabric choices. Depending on the size you want the flowers will depend on how long you cut the strips.Then I tied a know in the end. This knot will become the middle of your flower so you want it as close to the end as possible, and it doesn't have to be super tight.
 Next you begin to roll the fabric and you curl it around the knot. You need to glue as you go with your hot glue, but be careful to keep the glue on the underneath side of the flower. Continue around until you have used all the fabric. I then glued the end to the underneath side of the flower.

Here are what my flowers looked liked when I was finished. These were super easy and quick.

I then went ahead and sewed them onto the tank. I went around the outside edge of each flower going all the way around the outter edge and then did a couple of stiches in the middle to make sure the flowers were completely attached.


Here are what my final tanks look like:


I just LOVE how they turned out and am looking forward to making more as well as making some for myself.
signature

Wednesday, April 11, 2012

Upcycled Pillows

**In case you missed my guest post, here is the fun project I did!! It was pretty easy and super fun!! Jake is already requesting more!!**


T-shirts always seem to wear out around our house...and with a husband that wears them everyday, we go through A LOT!! 


Well, my hubby has a few that bring back some special memories or are just plain cool, but he has, well let's just say made them not as attractive to wear anymore. So I have been looking for a cool way to use these t-shirts. I've heard of the quilts, but they don't quite fit so when I saw some t-shirt pillows I knew that it was the PERFECT idea!!
 
My son's room is baseball themed and since most of the t-shirts I had to work with were baseball/sport related they would be a great addition to his room! 
So I got to work!

Supplies: 
  • old or new t-shirts
  • stuffing (higher polyfil the better, or you can use a pillow form)
  • pins
  • rotary cutter and cutting mat
  • lightweight fusible interfacing
Now let's get started:

First off decide what part of the shirt you are going to use.
Using your rotary cutter and mat line the shirt up and cut you will want your image to be centered so cut accordingly. Cut through both layers of the shirt.

Now cut your interfacing to the same size as your pieces. You will want to iron this onto both sides of the pillow, it helps to keep the shirt from stretching and tearing after you sew.

Next, pin right sides together and then sew around the outside leaving 3-4 inch opening for you to stuff.
 
Trim corners and then turn rightside out, and STUFF! Then finish off with an invisible stitch.
Display with JOY and ADMIRATION!!
The smile on my son's face is enough for me to know that it's a job well done!

Thursday, January 12, 2012

Pajama Monster

Now what would Christmas break be without a little craftin??
NO FUN that's what!!
Well my niece found this super fun Pajama Eaters tutorial so of course we had to make it!! Since neither one of us are particularly good sewers we called in an expert, Grandma Fowler!!
She made an example for us and then we gathered our supplies, she headed over with her machine and we got to work.
 I wasn't very good about taking pics at the beginning...sry!
Here we have after we have attached the body and head to the mouth, which includes a zipper, and also added the eyes which we used Steam-a-Seam for.

Adding the lining...
Getting arms and legs all sewn up!

Here are our Pajama Eaters with the arms attached...not too bad!
Sewing on the legs, this was a little tricky, but not terrible. You just have to concentrate!
Here we all are with our complete Pajama Eaters!! I LOVE how they turned out and the kids can't wait to use them!
Thanks Grandma Fowler for your help and sewing expertice!

Watch out Pajamas...here we come!!
Want to make your own Pajama Monster, then head over to see Jodi and she'll show you the way! (And A LOT of other fun stuff too!!)


signature

Monday, August 15, 2011

Baby Bonanza


Currently we have 2 friends that are expecting babies. One is expecting their second, hopefully a girl, and the other their fouth...SURPRISE!!
Even though they have supplies and this isn't their first our group of friends decided we should have a baby shower for them anyway. Nothing super fancy just a reason to get together and celebrate some great friends and their new additions.
 
  1. I decided since I had recently mastered the ruffle that this meant I should really try to make ruffle bottom onesies...I've been dying to make these! I started off with the onesies and choosing my fabric/ribbon.                                                 
  2. I sewed down the middle of the fabric/ribbon with the loosiest stich on my machine.
  3. Next I pulled the top thread to make the ruffle. I pulled it pretty tight, and then loosened it to make it fit the length of the onesie.
  4. Next pin the ruffle onto the onesie where you would like the ruffle. I hadn't pinned in my previous trys, but with this you really want it to be perfectly straight.                                
  5. Once pinned I I sewed down the middle of the ruffle. Then continue on with the rest of your ruffles, mine are less than an inch apart to create a close ruffle. (As you can see with the fabric ruffles they are slightly wider so I only put 2, 3 just looked too crowded.
  6. All done and ready to enjoy!

Here are my completed baby gifts. Each mom also recieved a coordinating long-sleeve onesie, crocheted hat, and then personalized blocks. (I make the blocks as well, they are my home-based business)
 

                                                         signature

Monday, August 8, 2011

Tank Time

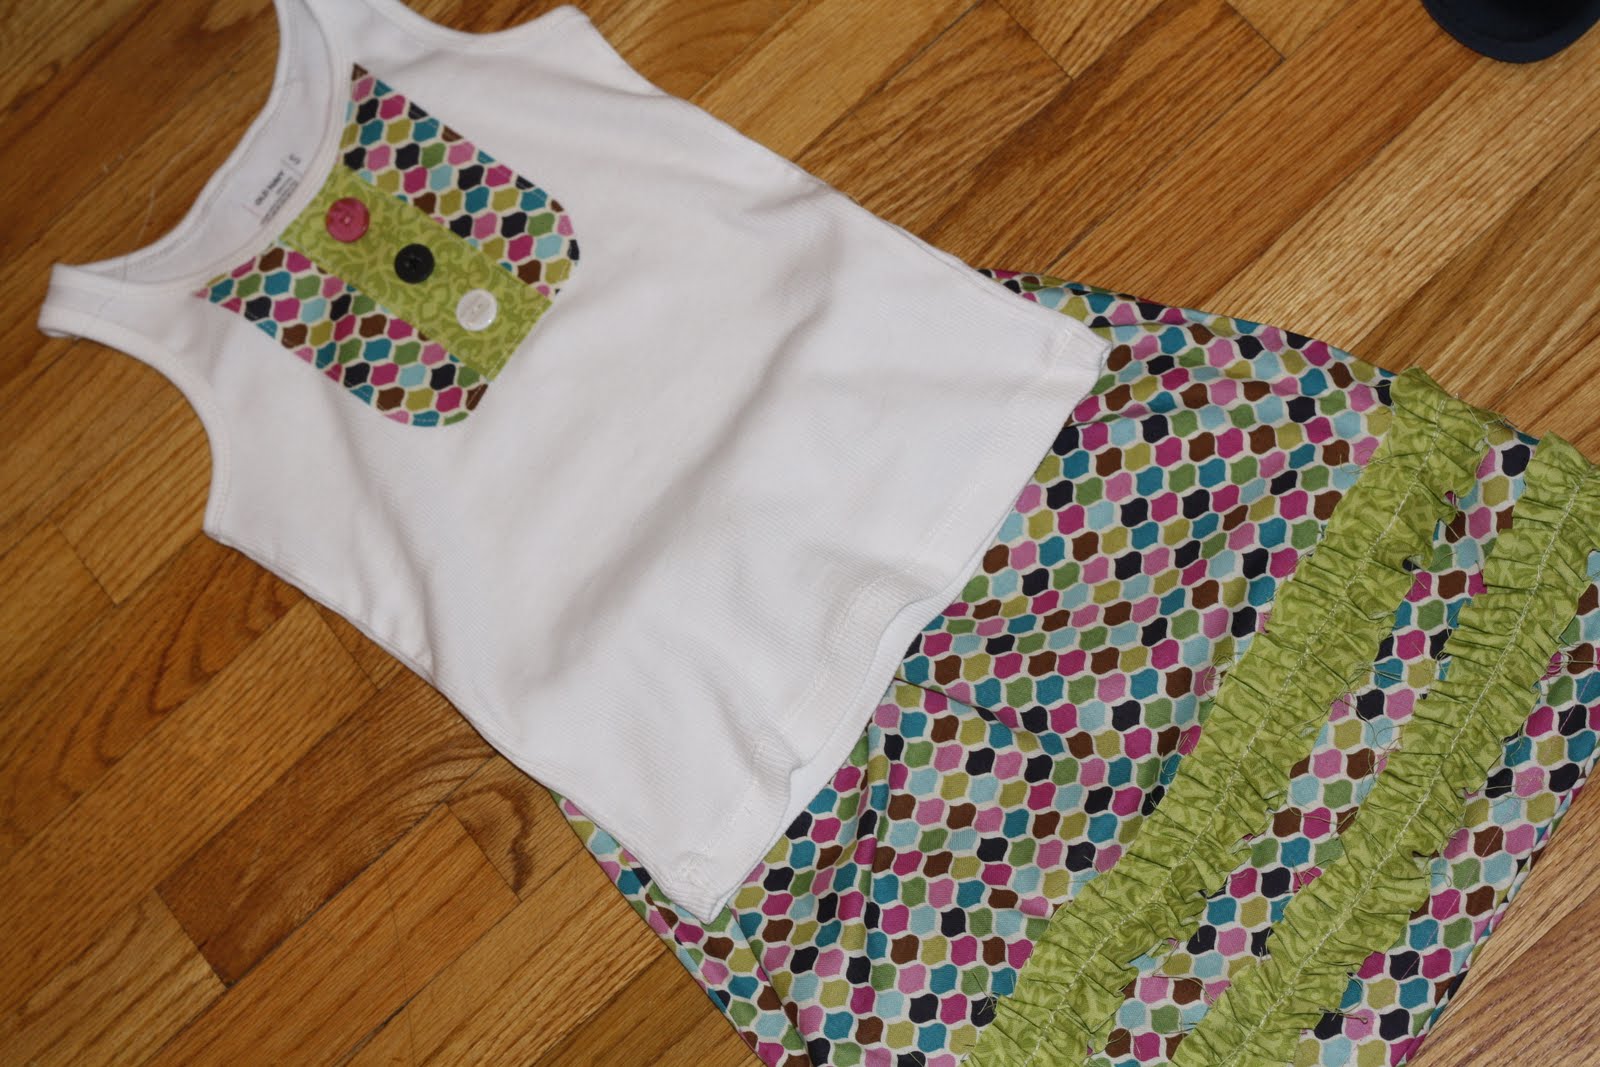
I am of course totally addicted to sewing and just can't seem to get enough...so when I finished this skirt:


So I got out a tank top that I had on hand and got started. I have seen tanks like this before so I knew the look I wanted.
  1. I began by making a pattern.
2.  I then used this to cut out my fabric. I cut the main piece out and then used a smaller strip to go down the middle. I used a pattern for this as well. Once cut I used some Steam-a-Seam and ironed it on the back of both pieces. I LOVE this stuff!!

3. I then ironed them onto each other and then the shirts.
4. Next, I went ahead and stitched around the outside of both shapes. I started with the big one and then just had to quickly stitch down the sides of the smaller one.

5. For a little extra detail I added some fun buttons I had on hand. I love the extra character it gives the shirt!

And now she has a brand new back to school outfit!! I can't wait for her to wear it, of course she can't either!! I hope you all will try this and if you do I would LOVE to see how they turn out!

signature

Sunday, August 7, 2011

New Outfit

Lately I have been on what I would say is a break from crafting...just too much summer fun to be had!! Well this past weekend, with my son sick and us unable to head out anywhere I decided to try a new sewing project!
I found this great tutorial over at Less-Than-Perfect Life of Bliss! I love an easy yet wonderfully cute project and this was the perfect one.
I started out by measuring Em's waist and deciding how long I wanted the skirt to be.
Her waist was 24" and I went with a length of about 17".
 
First I cut my fabric the width should be your waist measurement time 1.5, so 24x1.5=36". For the length take your desired length and add about 3", 1.5" . I then sewed up the sides ironing the seams flat. I then went ahead and did the bottom hem as well.


Next I started my ruffles, the contrasting fabric should be about twice the width. Then using you loosest stitch on your machine stitch down the middle of the strip. Once done, pull the top thread creating a ruffle. You can adjust this to your desired look.
 
Next, pin the ruffles onto your skirt. Then carefully stitch down the middle of the ruffle.Once this is done you can add your elastic to the top. The length of the elastic should be 2-3 inches less then your waist measurment.


Once you have this you're done!! (Of course if you're me you quickly decide that you should make a matching shirt!) So I did! Here is the whole outfit. I will be add a tutorial on the shirt as well!
 
signature