Showing posts with label holidays. Show all posts
Friday, February 22, 2013
Valentine

Tuesday, December 11, 2012
Holiday Rush
And I finally got around to ordering my holiday cards, so at least that part of things is done! YEAH!

Sunday, December 9, 2012
Sneaky Elf
Day 2:
Day 3:
Day 6:
Day 7:
The kids are really loving all the adventures "Chip" is having this year!! I am too!!

Saturday, November 24, 2012
Thankful Memories

Tuesday, October 30, 2012
Halloween Treats
And a bunch of ghostly ghouls:

Friday, July 6, 2012
Family*Fireworks*Fun
As usual we spent the 4th spending time with family and friends celebrating the freedoms our country offers!
To start our day we headed to the Second Annual Patriotic Parade hosted by my friend Katie from A List Makers Life. We gather at a local boardwalk, decorate our bikes with festive holiday decorations, and pass out candy to anyone on the boardwalk and share some festive spirit. {This year we added some water...its been EXTREMELY warm in these parts!}
A good time was had by all!! It definitely was warm, but worth the heat to enjoy some fellowship with friends!
We headed to the pool after our parade to cool down...3 hours later, we were significantly cooled and ready for the rest of our day. We hung out, played and watched a movie.
To end our evening we headed to the fireworks.
Hope you and your family had a fantastic 4th!!

Thursday, February 16, 2012
{LOVE}
These turned out really cute!!
This has got to be my most favorite Valentine!! I have some really fun outtakes to share with you later this week!! (Sorry I can't figure out how to turn it!)
I waited a whole year to make these!! I bought 90 mini candy canes so I was sure to have enough!

Wednesday, December 14, 2011
Fun Forest
I NEEDED...okay WANTED a few more things to add some decor around the house. Especially this year I am low on decor, since we are not home for the holidays I didn't drag out all my decorations. I have been wanting to make some kind of version of these since I have seen them everywhere on pinterest.
To get started gather your supplies.
You'll Need:
- Styrofoam tree (any size will work)
- Yarn
- Pom poms
- Hot Glue
I started with the yarn tree.
- To begin I put some hot glue along the bottom of the shape and slowly wrapped the yarn around. This gives you a solid and straight bottom to work with. Also this ensures that you get all the way down to the bottom and don't see the styrofoam.
- Next begin wrapping. I started not overlapping, but then decided I kinda liked the look of the overlapping. Make sure you're watching so you don't have an empty space....I learned this the hard way! Wrap till you have reached the top.
- When at the top for the top inch or so I again used the glue. This made sure it stayed in place as well as covered the entire shape.
Now on to the pom pom tree. For some reason with this one I forgot to take pictures! But it goes like this:
- Using hot glue run a line around the bottom of the tree...add the pom poms one by one. I used a 1" pom pom. I went in a pattern using the 1" and then adding some fun color in a 1/2"
- Continue adding lines of glue all the way up the tree until it is fully covered.
- I then glued this tree to a candle stick holder I had...I know I have another one somewhere so when I find it I will put the other one on one too!! I used the hot glue to attach it.
Here is my fun forest...I am thinking I might make a larger one next year to add to the top of my kitchen cabinets.

Friday, December 9, 2011
JOY
The holidays always suck me into full crafting mode and I find tons of fun and festive ideas that I just HAVE to try...well this year is no different other than Pinterest in NOT helping me, just encouraging me!
I have seen many variations of these yarn letters and just LOVE how they look, so I decided to put a holiday spin on some....
Here is what you'll need:
- colorful yarn
- paper mached letters
To start I began by wrapping the top edges of each letter...now I would LOVE to show you pictures, but well I forgot! Once you have the top edges wrapped I began to wrap horizontally around the remainder of the letter until it was fully covered. I'm not going to say this was easy, cause it wasn't...just keep trying an adjusting as you go.
Here are what my complete letters look like:
I am now thinking I might do some for everyday...just trying to decide what word to do, since some letters are more difficult then others!
Thursday, December 8, 2011
Dry Off
Now I have fun and festive towels!! There were super simple too!! I think it too me about 30 mins if that for both, and that was with being interupted!

Saturday, November 26, 2011
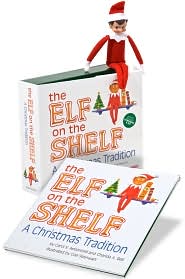
The Chronicles of Chip
I can't wait to see what crazy things this elf has planned for this year!!
(Don't worry I plan to keep you updated!)

Wednesday, October 5, 2011
Gettin Ready to Haunt
Gather your hoop and tulle. Cut the tulle into strips. I have 3 colors, glitter orange, glitter black, and black. I cut them about 12" long. I cut the whole spool of glitters and just about 12 of the regular.
Then begin to loop around your hoop. I took each strand, folded it in half, then folded it again. (This does give you a looped end on the outer part of your wreath, but just cut it when done)
You can either loop it around or tie it. I looped. Continue the patter all the way around the hoop til your wreath is as full as you would like. Then I looped a longer piece around the hoop to hang it from.
There you have it...a perfectly spooky door!

Tuesday, July 5, 2011
The Fourth
Here's Emmah and Jake getting ready to decorate their wheels and to pass out some candy to any friends we meet along the way! (Each kid got to decorate their own bike, then get a back full of candy, keeping 3 for themselves, to hand out along the route!)
Here is our whole group of new and old friends!! This was a fun time and we can't wait to do it again next year! (We even grabs some deals today for decorations for next year!!)
Thanks again Katie!

Thursday, June 30, 2011
Red, White & Blue
red hots wreath form ribbon (festive 4th of July colors) hot glue gun Dimensional Magic (Or spray polyurethane) coordinating
We then began to assemble our wreaths. We started by wrapping our wreaths in red ribbon. (The wider the better, takes less time!) Then we glued our red hots on the wreath form starting with the top and then working our way around the side, middle and back.
Next coat the wreath with your Dimensional Magic or polyurethane. If you brush on either, only do it once or the color may come off the red hots (One used a spray, and it worked the best, I highly reccomend this option)As the wreath dries you can get to work on your rocket, or stars. I went with stars only because I need something flat on my door, limited width. Finally, take your two coordinating ribbons and loop them through the middle of the wreath. Hot glue them together in the back. Then stand back and admire your work!
And here is the final product, I LOVE how it turned out and am just feeding my wreath fetish. How many is too many wreaths????

Subscribe to:
Posts (Atom)